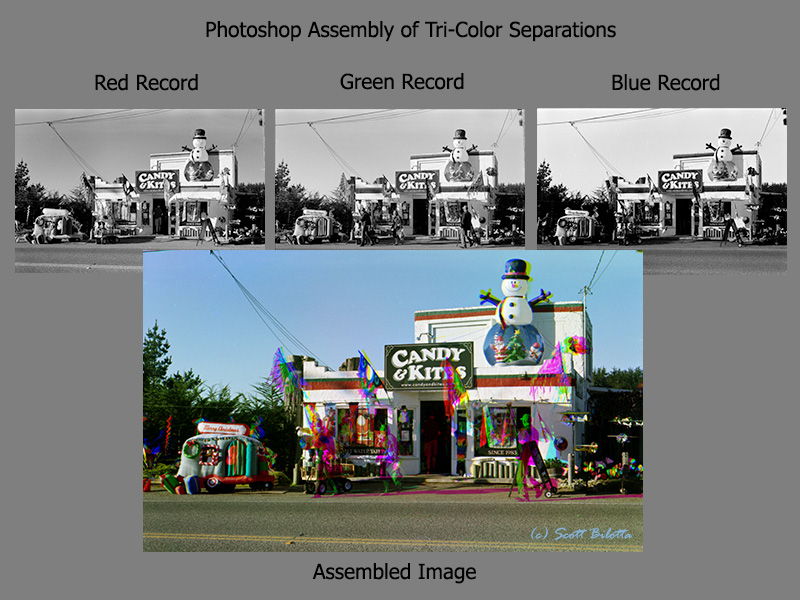
© 2013 Scott Bilotta
The separation photographs that appear on this page were taken with a Nikon FM camera on T-Max 400 35mm film. The individual frames were exposed consecutively through red (#25), green (#58) and blue (#47B) tri-color filters. The negatives were then scanned and inverted to positives by the scanner software. The procedure that's described below can be applied without change to negative images as well as positives. Of course, if you are working with negatives, at least as the final step you will want Photoshop to invert your final image to a positive.
With Photoshop it seems that no matter what you want to accomplish, there is more than one way to skin the proverbial cat. Having experimented with a variety of ways to assemble separations in Photoshop, I've settled on the following procedure as the simplest.
Other methods that I've explored included copying separations to layers and using the Merge Channels command. You may find one or both of these approaches useful depending on the nature of your separations and the look that you want in your final image.
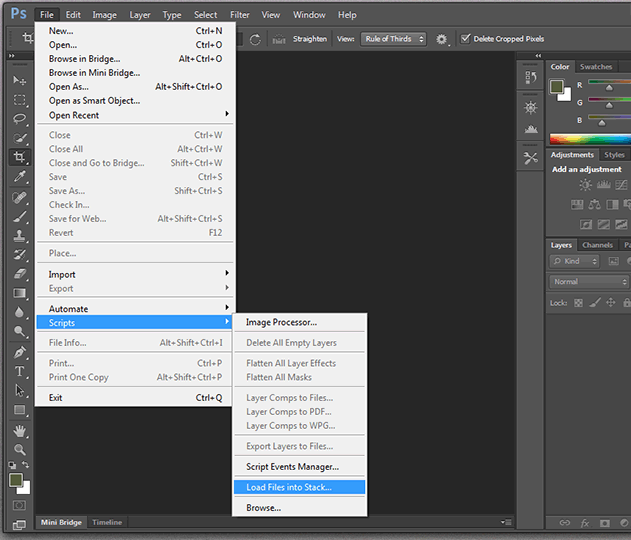
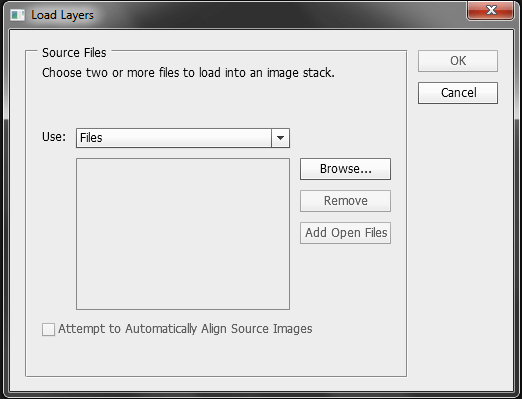
The procedure begins by using the Load Files into Stack script to open the separations in Photoshop. This is not necessary; you can open your separations individually instead, but what the script has to its advantage is that it will attempt to align, or register the separations for you.
Once the separations are assembled you'll have the opportunity to manually adjust registration, and this is easy to do. However, you won't be able to rotate the individual channel images; they can only be moved vertically and horizontally. The Load Files into Stack script will attempt to apply rotation to the individual images. It is common for separations to be out-of-square with each other so this is a real time saver. If your separations require rotation to achieve precise registration and you don't use the load script, or if the script is incapable of achieving good registration because of problematical separations, then you will need to rotate them manually.
I haven't illustrated a method for manual rotation on this page but here is a brief description: Create an image with three layers. Each layer should be one of your separations. Make the top two layers visible and hide the bottom layer. Reduce the opacity of the top layer. From the Edit menu, select Transform/Rotate. Rotate the lower of the two visible layers and as you do, with the appropriate opacity setting you should be able to see the images in both layers. Align the lower image with the upper. When the images are square (ignore lateral and vertical misalignment), hide the second layer, make the bottom layer visible and rotate that layer to align its image with the top layer. When the images are square, set the opacity of the top layer back to 100 percent. Now proceed as described below but bypass the load steps.
So let's begin...
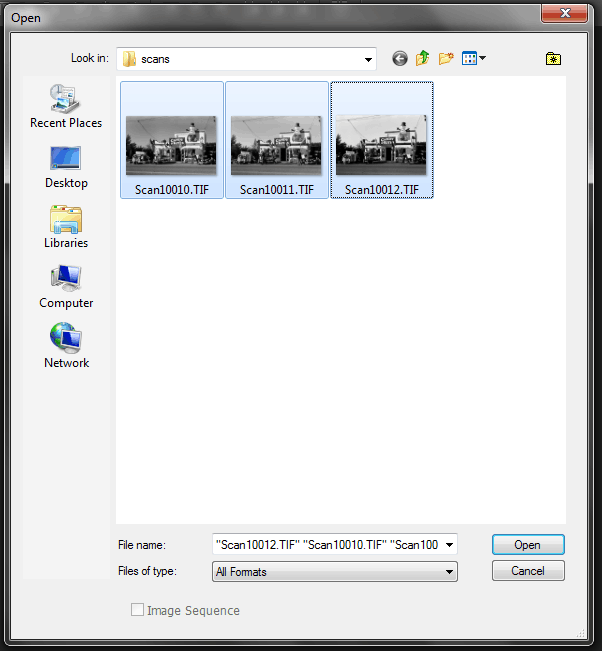
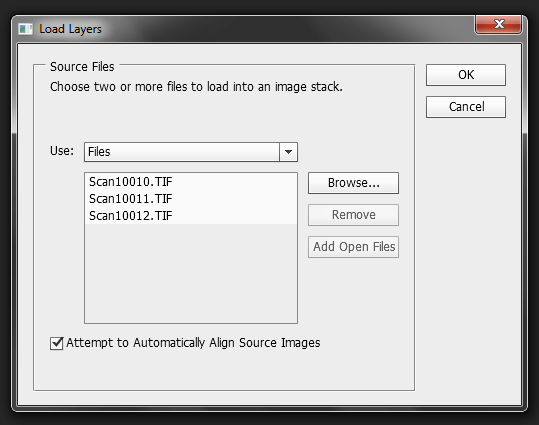
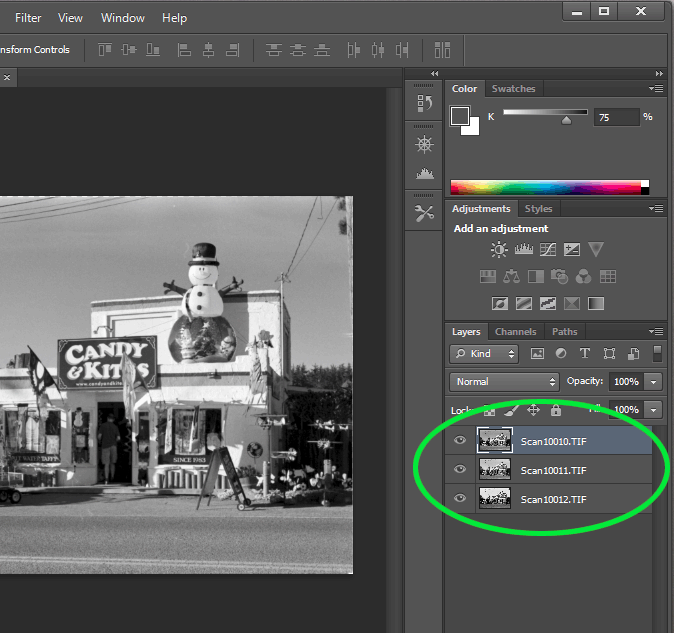
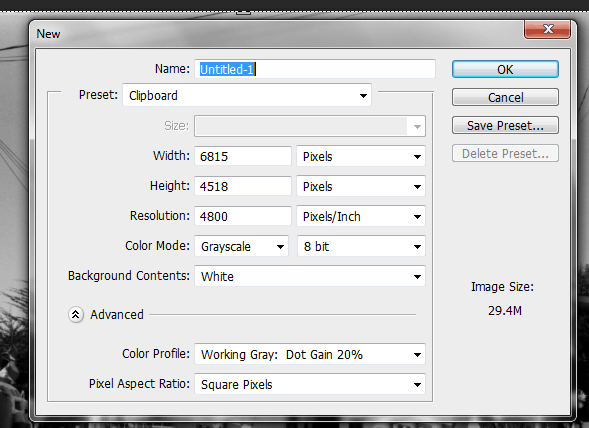
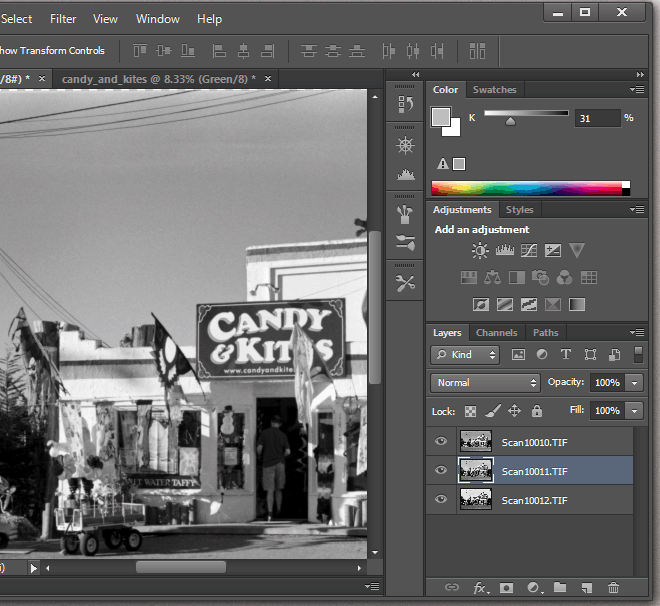
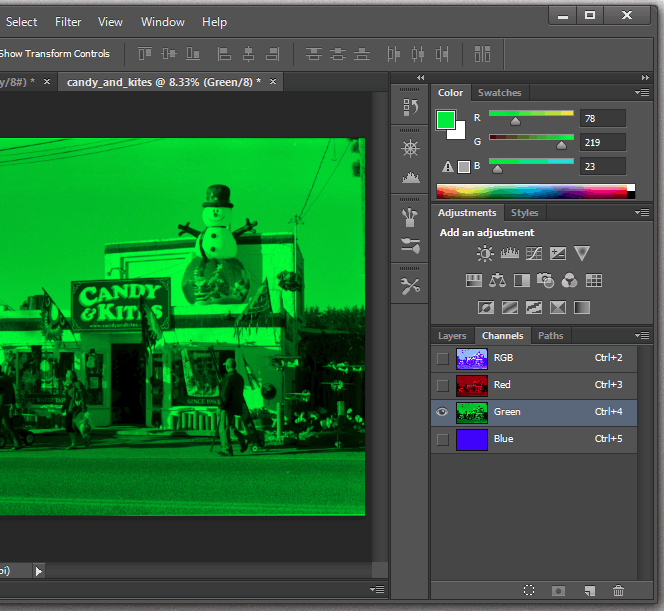
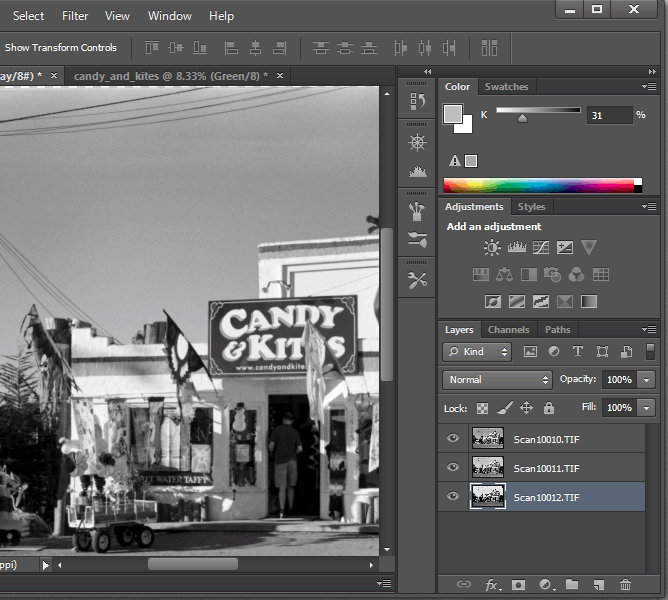
Photoshop creates a new image and assigns a name, in this case Untitled1. As the images are loaded, Photoshop will attempt to align (register) them. Accuracy depends on the quality of the separations. Often you will want to tweak registration, and you can do so later. Here we see Untitled1 and its three layers: Scan10010, which is the red record; Scan10011, the green; and Scan10012, the blue.
Click on the top layer in the Layers palette to make it active. In the image above, the top layer, Scan10010.TIF is highlighted indicating that it's the active layer. Actually, it doesn't matter which layer is selected at this step, but starting with the top layer will help keep things organized as we proceed.
Again, Photoshop will assign a default name, in this case Untitled-1. This name is different from the separation image which was named Untitled1. Your results may differ. Now is a good time to assign a name to the final color image. This is illustrated below.
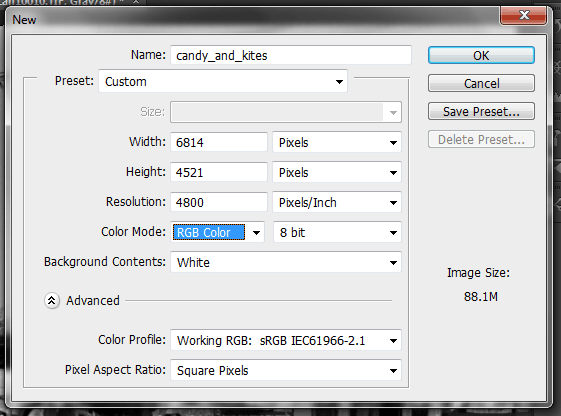
This new image will become the final color assembly so give it a descriptive name.
It's important to change the color mode from grayscale to RGB Color. If you are working with RGB separations don't change the color mode from RGB.
Don't alter the width or height. The other attributes: resolution, color profile, bits and pixel aspect ratio can be modified.
Notice that preset changed from clipboard to custom. Photoshop is indicating that the image description was customized by the change to color mode or by changes the user may have made to other attributes.
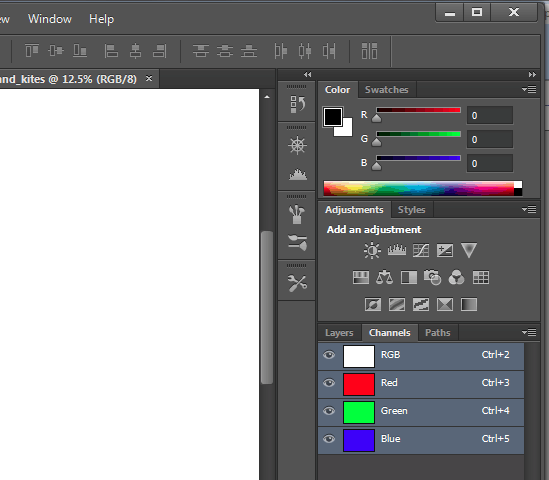
Switch back to the separation image and make the Layers palette visible again. Click on the second layer which in this exercise is the green record.
Switch back to the new color image. Switch from the Layers to the Channels palette and click on the green channel. Edit/Paste the contents of the clipboard to the green channel.
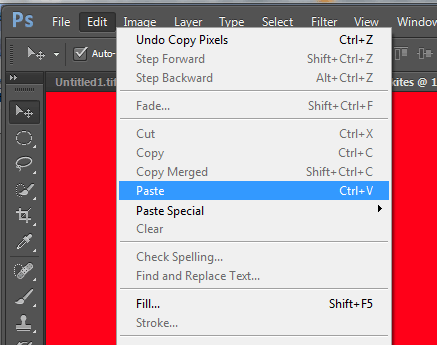
Switch back to the separation image and make the Layers palette visible again. Click on the third layer which in this exercise is the blue record.
Copy the third layer to the clipboard. It's not necessary to select the image again before copying.
Switch back to the new color image. Switch from the Layers to the Channels palette and click on the blue channel. Edit/Paste the contents of the clipboard to the blue channel.
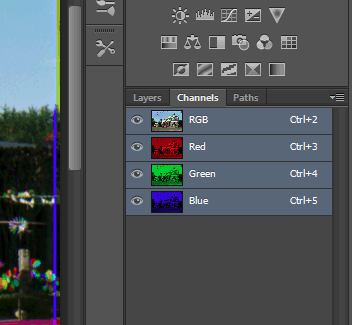

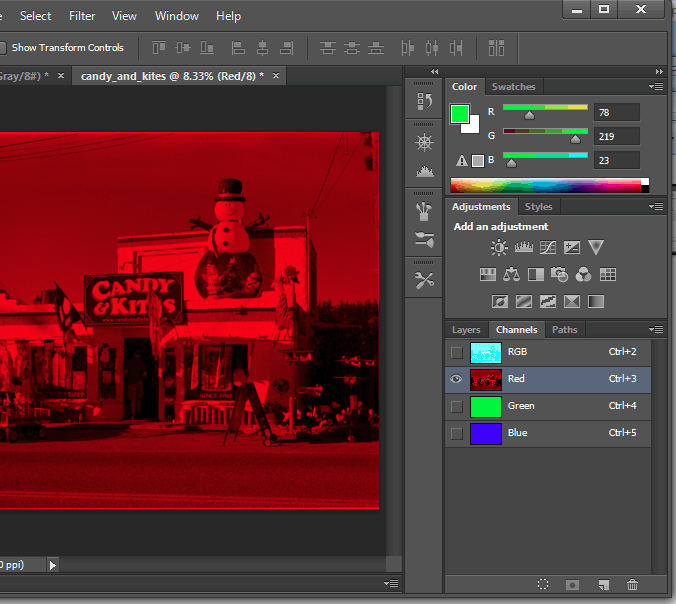
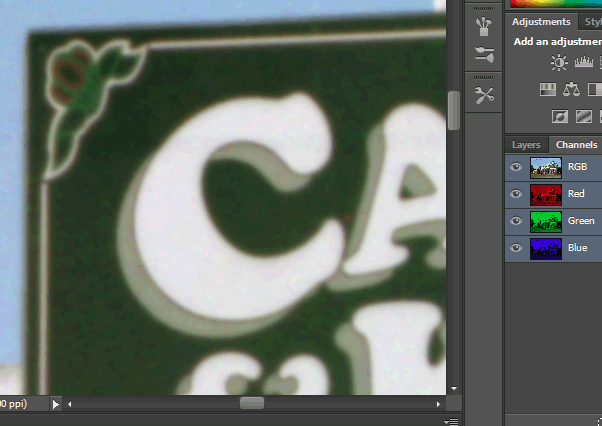
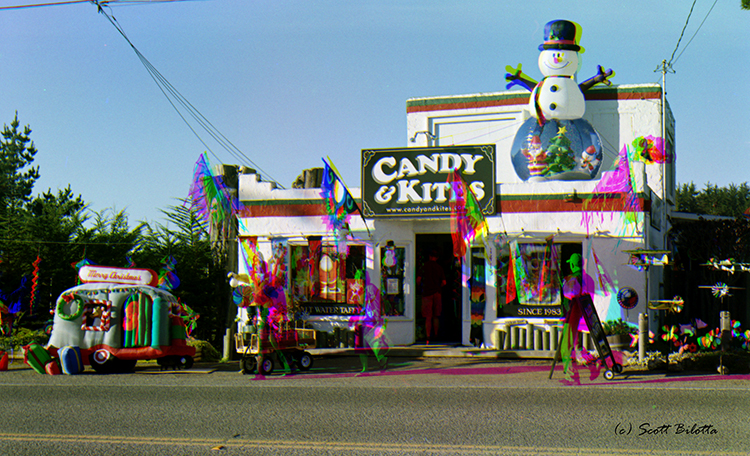
And here it is, the full-color assembly. However, registration is not yet perfect. Color fringing is particularly noticeable when the image is magnified. We'll improve registration in the following steps.

Magnify the image to check for color fringing. Fringing is obvious in the sign and door frame, i.e., the stationary areas of the subject. The flags and Santa Claus moved between exposures so we won't (don't want to) attempt to register them.
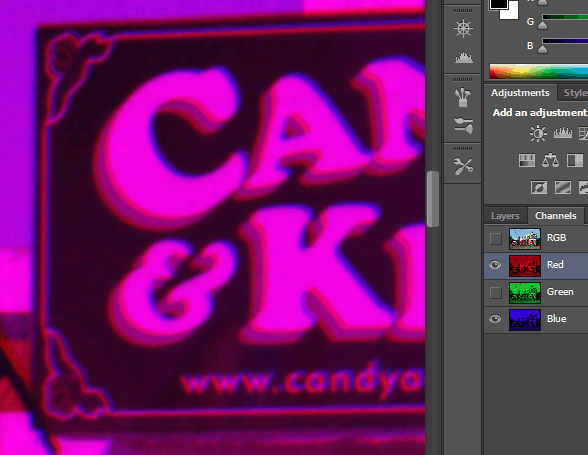
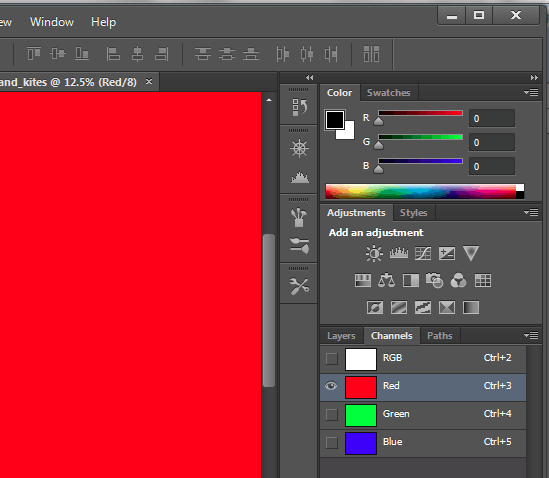
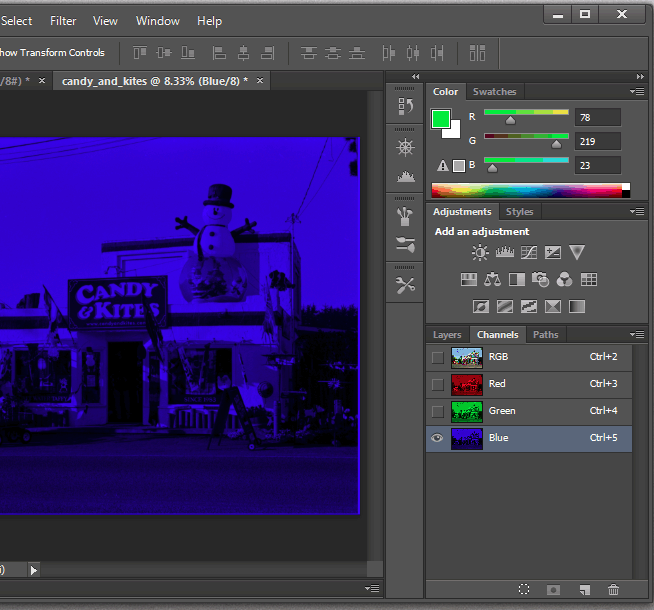
Individual channel images can be moved around with the Move tool. To move a channel image, select its channel. In this example, I selected the red channel. Notice that it's highlighted. I also made the green channel invisible (unselected its eye) and made the blue channel visible by selecting its eye.
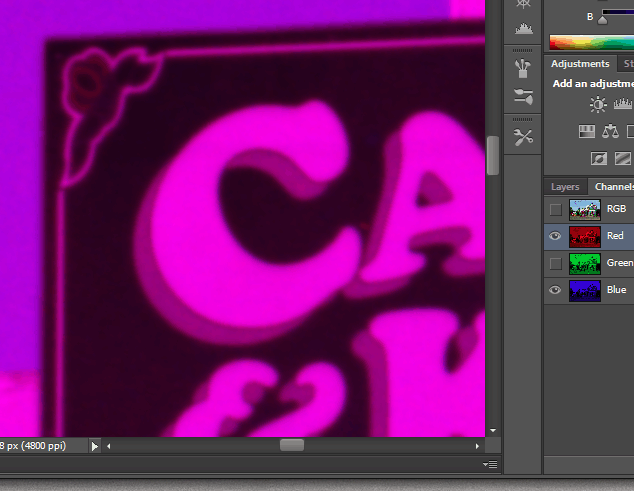
Use the Move tool and/or the arrow keys on your keyboard to reposition the image. The arrow keys allow you to make very fine adjustments.
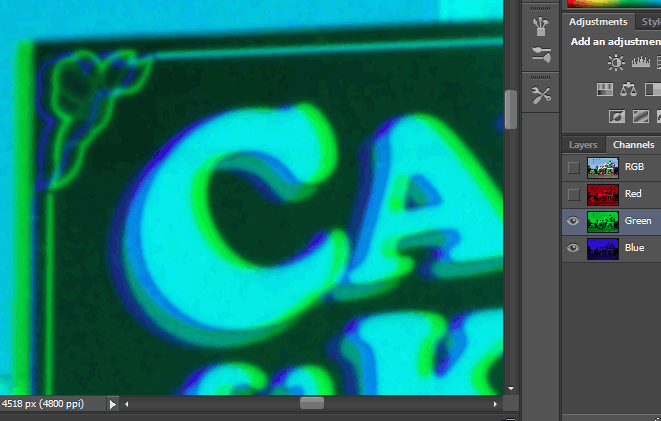
Next align the green image with the blue. Select the green channel. The green and blue channels should be visible (eyes selected) and the red channel should not (eye unselected).
Use the Move tool and/or the arrow keys on your keyboard to reposition the image. The arrow keys allow you to make very fine adjustments.
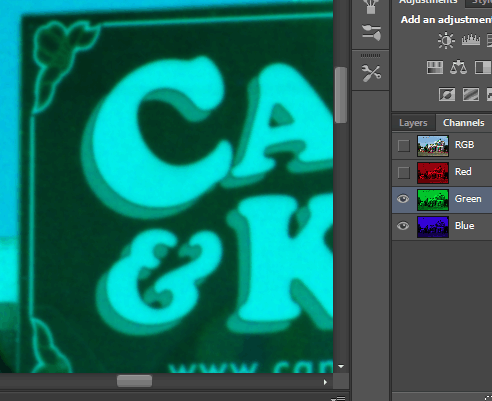
At 100 percent magnification it appears that the three images are in registration.
It's not necessary to align layers in the sequence given above, i.e., start with blue and red. Start with the combination of colors that allows you to most easily view the subject's edges. You can also make all three channels visible rather than view two at a time. Whatever works best with your image is the way to go.
Related Information
|
Page created January 25, 2013;
updated December, 20, 2020 |